Showing posts with label decor. Show all posts

Saturday, June 15, 2013

Before & After: Transformed Tea Cart

It is the best feeling when you come across a great item at the flea market! I found this awesome mid-century tea cart at the 3rd Sunday Market in Bloomington, IL last month. The round shape and original lucite wheels are what I love most about this piece. The chipped black paint and rose etched glass...not so much. It needed some TLC and I was hoping after getting it spruced up that it would be a great addition to my back deck. 

BEFORE:


IN PROGRESS:
After sanding down the clumpy paint job that was on the cart. A HUGE thanks to my dad for his help with the not-so-fun paint stripping and sanding portion of this project! 


AFTER:
A fresh white paint job, a brand new piece of mirror for the bottom shelf and a brand new piece of textured glass for the top shelf...now we're in business! I think the bright white color shows off the circle shape so much better. 


I think it looks great on the deck! 
Will be the perfect place to serve drinks or an appetizer this summer!


Tuesday, January 31, 2012

Magnetic Memo Board

I have a confession to make....I LOVE Pinterest! Love, love, love it! This magnetic memo board is my first completed project inspired by a pinterest post. So easy....so cute...so functional...and so many options to fit in your own home decor. Check it out:

Here is the pinterest post inspiration...a blog post from TaterTots & Jello

Here is what you need for this project:

  • frame
  • sheet metal
  • fabric
  • tin snips
  • tape
  • spraypaint (optional depending on the frame you use)
Supplies before getting started
I bought a frame at the Habitat for Humanity ReStore for $2...1/2 yard of houndstooth fabric was $3.50 and the sheet metal was about $10. I already had some spraypaint, so this project cost a total of $15.50. 
Remove glass from frame and cut the sheet metal to the size of the glass.
(Wear gloves! The cut metal can be sharp.) 
Wrap your fabric around the sheet metal. I affixed it with painters tape.


Place your fabric covered metal into the frame.
Ta Da! Magnetic message board for my kitchen desk.
Perfect place for a magnetic grocery list pad
and a place to put invitations and cards.
Finished product on my kitchen desk!


Monday, September 5, 2011

Hallway Photo Gallery

I love taking pictures! And I like to show them off in my house too. My favorite photos to frame are travel photos of scenery and things from places that I have visited. When I first hung 4 frames in my hallway I used photos from my trip to China...a photo of a doorway & large vase, the inside roof of a pergola, a bridge over a pond and large paper lanterns hung over a pond. Loved it and enjoyed them in my hallway for a few years. 

But it was time for a change! 

I had room in the hall for another matching frame and I wanted to switch out the pictures for new ones from my recent trip to several Central American countries. A quick trip to Michael's (with my 40% off coupon in hand!) for another frame and Sam's Club for the photo enlargements and I was almost done with the project! (The hardest part was hanging the new frame level with the old one!)

BEFORE:


AFTER: 


The hallway feels complete now...three horizontal frames on one side and the two vertical frames on the other side on each side of the bathroom doorway. My own little gallery! 

Try this in your house...so easy...inexpensive...and fun to switch out the photos when you want a change! If you aren't into taking pictures you can do this same thing with pictures from calendars or images you print off from online. You can also search around on Flickr and look at other people's photos...many of whom will sell you an image if you want it!

Wednesday, February 23, 2011

Anything Can Be Art: Magazine Covers

This is such a fun idea that has numerous possibilities...using magazine covers as artwork!

One of my favorite vintage store in downtown Champaign, Carrie's, has recently carried some reproduction magazine covers framed and ready to hang! Very cool! The store has had a good selection of vintage University of Illinois football programs and I picked up a group of 3 to hang in my office...love them and get lots of compliments!


My mom picked up a pair of reproduction and enlargment Harper's Bazaar covers from the 1930's...they are amazing...vibrant colors and modern images! She hung them in a powder bathroom and they add great color and interest to the small space.


Other ideas for magazine covers as art:

  • Vintage Sports Illustrated covers (or other sports magazines) for a boy's room, bar area, or man cave.


  • Travel magazine covers...photos of places you've visited or would like to visit!


  • Fashion magazines...Vogue, Harpers Bazaar, etc.


  • Saturday Evening Post or The New Yorker

  • Film or Theatre magazine covers to use in your media room, den or home theater.

  • Photo of your favorite celebrity icon on the cover of Rolling Stone.
  • Websites to order magazine cover art:

    Thursday, January 20, 2011

    Anything Can Be Art: Old Bicycle Parts

    This was a fun & easy project! When I first put up the floating shelves above my TV credenza I only had a concept for one shelf and not the other. One shelf displays 3 turquoise vases from Crate and Barrel. I bought them this past summer when the credenza and shelves were only a vision in my head! I was coming up empty for the second shelf until I found a very cool and inexpensive picture frame at Target. It is gray, yellow and white and has vintage looking bicycles all over it. Thought it was a good way to bring some yellow over to that side of the room. The frame wasn't enough to fill up the shelf, though....so this is when the idea of bicycle parts on the shelf came to me! But not just regular bicycle parts...high gloss yellow and white bicycle parts! Are you still with me!?!?

    I picked up these 3 old bike parts at The Bike Project in Urbana. They are a non-profit organization that operates a small shop and is the only place in town I could find that sells individual parts! I think all 3 pieces cost me about $8. It was fun to root around in the boxes and boxes of parts, but I did end up quite greasy!

    All three pieces had some grease and dirt on them, but the smaller gear was a mess! First step was to clean and degrease them. I bought a bottle of Purple Power degreaser and it worked great!
    After cleaning and drying, I sprayed them with some white primer and then a couple of coats of high-gloss spray paint...two pieces in yellow and one in white.


    Final product up on the shelves with the picture frame...

    By the way...the image in the picture frame was something I printed off the internet from a Google search of "vintage bicycle"...makes it look more like art instead of sticking a family photo in there...


    I like...I like! One of the fun things about shelves like this is that you can change them up from time to time to freshen up your room or use them for seasonal decoration displays...swapping out items on the shelves can give you small little fun projects as well as allow you to rotate your display pieces so that they all get a little time out for others to see...so, I guess we'll see how long the shelves stay looking like this...but for now, I am really happy with the way they look!

    Vintage Find: Yellow coasters

    Fun vintage find....yellow patent leather coaster set! Cool, huh!?!? I found these at the Ravenswood Antique Mart in the Lincoln Square neighborhood of Chicago. This antique mart is a very fun place to browse, but most items were very much over my price range! I guess that is why I only came home with these coasters! ha! Seriously though, I would recommend taking a cruise around this store if you are looking for some high quality mid century items...everything in the store is in really great shape or has been restored. Quite a bit of furniture and tons of accessories and vintage jewerly. It is a real antique mart where different vendors have "booths" in the space...so the items are coming from several different sources. I have made two visits and both times would say that all vendors are displaying pristine things with a price tag to match!

    The entire set was in really great shape with no tears or scrathes in the patent leather...and I thought the buckle was really fun too!


    Thursday, January 6, 2011

    Ta Da! Transformed Credenza

    You know when you have a vision...you can just picture something in your mind and that is how you want your room to look...that was me with my living room. I had a vision since I moved in of a very long, low credenza up against one wall. A piece with some open and some concealed storage. I was picturing some floating shelves hung above it on one side and a flat screen TV on a stand off to the other side. Needed something to replace my old IKEA 3-piece "entertainment center" pictured here...


    I searched and searched some of my favorite catalogs and nothing really struck me...I also hunted on Craigslist for several months...and then the perfect piece was posted. It would need some work to transform it into what I wanted, but it was going to be good...I just knew it. I took my mom along with me to go look at the piece...she needed more convincing that this was really going to look good in my room...but I knew it had a lot of potential! Here is the credenza shortly after unloading it into my garage:


    What I loved about it...clean lines, sits up off the ground a bit, clean fronts to the doors and drawers, and it is super long (about 90 inches!). Love! Now here is where the work came in...took off the doors on both ends and removed the drawers and shelves that were inside, sanded the entire piece thoroughly and then painted it black. Wow...the sanding was a tough job...it really took some elbow grease to get the varnish and stain sanded off. The rental of an orbital sander was a must! (About $20 for one day...well worth it!)

    The finished product...my vision is now reality...


    Of course right after bringing the credenza into the living room it was obvious that a new TV was in order too...went out to Sam's Club and bought one that afternoon! It is a much better fit than the old clunky TV, don't you think? The floating shelves come from Target for $9.99 each. Still working on the arrangement of the items on the shelves...more to come on that later...

    Monday, November 8, 2010

    Reupholstery!!

    The good news...I found a pair of mid-century lounge chairs that I love at a great price! (Found the chairs at Furniture Lounge of course!)

    The bad news...they were a mustard yellow color that just wasn't going to work!

    Solution: Reupholstery!


    BEFORE:


    AFTER:


    LOVE the way they turned out! I'm not going to lie...reupholstery is not cheap...but it can be a great way to customize a special piece!

    I had my heart set on contrast piping and it just so happened that my mom had the perfect black fabric on hand for the piping...perfect! The two chairs sit by an iron and glass table, yellow footstool and striped lamp...a great place to read, enjoy a beverage or watch TV! I found the yellow and grey throw pillows at a wonderful Etsy shop called Idari...check out her pillows in such fun fabrics at a great price!

    Monday, December 28, 2009

    Have yourself a merry little MODERN Christmas!

    Christmas is a fun time of the year to highlight your modern decor with a mod decorated tree!

    Nothing quite says mid century Christmas than a silver tree! A vintage aluminum tree would be amazing, but since those are a little hard to find, for now I will use my silver tinsel tree. I have decorated it with red and white ornaments...handmade red and white polkadot bows, glass candy cane ornaments, red glass spiral ornaments and much more!

    My mom's black and white Christmas tree is amazing! Check it out! She has a 7ft artificial white tree and has decorated it with some beautiful black, white and silver ornaments. She has quite a bit of "bling" on her tree too, which is really fun...reinstone word ornaments, black crystal sprays, and glittery high heel shoe and handbag ornaments. Lovely!


    I think this black and white look would also look great with a real flocked tree if you want to have a real tree in the house! Growing up, my grandmother always had a real flocked tree in her house and it was awesome. For many years she decorated it only with purple bows and purple glass ball ornaments...an awesome modern look!

    In keeping with our color schemes, both my mom and I wrap our gifts exclusively in corrdinating wrapping....paper, ribbon, bags, etc. It is so much fun to be on the hunt for a new paper or roll of ribbon that coordinates with our trees...such a great feeling when you find something new! The coordinating wrapped gifts under the tree really complete the look!

    Happy New Year!

    Sunday, March 22, 2009

    Round Reflections


    Round mirrors...wow...the possibilities are endless! Be creative! I was inspired by the circles on the bedding in my guest room to add round mirrors to the decor. I went with a random pattern and think it turned out awesome!

    All of the mirrors came from Target and were very reasonably priced. The large mirror is an 18" beveled mirror and was $19.99. The other 7 mirrors came together in a set also for only $19.99. The large mirror is big enough to actually be functional. I had been challenged with what to put on the walls in this room for a long time and I am very happy with the mirror grouping...gets me a little closer to "finishing" this room!

    Other round mirror ideas and inspirations:

    cb2 has a 5 mirror set framed in aluminum...very cool. Check out the room view pictures for some creative ideas. This one is my favorite...so orginal!
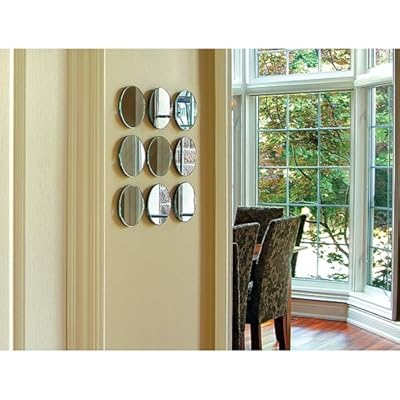
    • Target also sells a 9 piece mirror set that are all the same size. Very cool look.
    • A vertical grouping idea: